Winter Woods Mug

Winter Woods Mug by Abbey & Lincoln

Cozy Up with the Winter Woods Mug

One of my friends, Liz, loves to ski. Which kinda means you have to tolerate winter. She’s a better man than I am because I don’t ski. I don’t have a particular fondness for winter. But I appreciate the beauty of it – from the warmth of my yarn room with space heater. If you love the cozy charm of winter landscapes, then my Winter Woods Mug is the perfect way to bring that enchantment into your daily routine.

A Mug That Captures Winter’s Beauty

Inspired by serene snow-covered forests, this mug features an elegant and artistic woodland scene. The deep teal and soft snowy hues blend beautifully with warm earth tones, creating a design that evokes the wonder of a winter walk through the woods. Delicate falling snowflakes complete the look, making every sip feel like a moment of peace in nature.

Perfect for Cozy Moments

Whether you’re sipping hot cocoa by the fireplace, enjoying a morning cup of coffee, or winding down with herbal tea, this mug adds a special touch to your cozy moments. The contrast of the rich colors with the vibrant red handle and interior gives it a bold, stylish look while keeping it timelessly charming.

A Thoughtful Gift for Winter Lovers

Looking for a unique and meaningful gift? The Winter Woods Mug makes a wonderful present for nature lovers, winter enthusiasts, and anyone who appreciates seasonal beauty. Pair it with a bag of artisan coffee or a selection of winter teas to create a thoughtful gift set.

Why You’ll Love It:

High-quality ceramic with a vibrant, fade-resistant print
Beautiful winter landscape design for a cozy, rustic feel
Dishwasher and microwave safe for easy use
Choice of eight colors
Available now in my Etsy shop!

Bring the magic of winter into your home with the Winter Woods Mug. It’s more than just a cup—it’s an invitation to slow down, savor the season, and find joy in the simple moments.

Get yours today: Winter Woods Mug on Etsy

Cozy Cottage Sticker Pack

Introducing the Cozy Cottage Sticker Pack: A Year of Charm in 58 Hand-Drawn Stickers

There’s something undeniably magical about the places we call home—the way they transform with the seasons, the memories they hold, and the warmth they bring. Whether you dream of a quiet farmhouse, a charming city house, a bustling farm, or a cozy apartment, each home tells a story. That’s why I’m so excited to introduce the Cozy Cottage Sticker Pack, a collection of 58 hand-drawn pencil stickers that celebrate the beauty of home through all four seasons and major holidays!

A Sticker for Every Season & Celebration

From the first blossoms of spring to the golden hues of autumn, these stickers bring your favorite places to life in stunning pencil illustrations. Whether it’s a farmhouse covered in fresh snow, a city house glowing with summer sunshine, or a farm decked out for the holidays, you’ll find a sticker for every occasion.

Each sticker is designed to fit seamlessly into planners, journals, scrapbooks, and DIY projects. They add a cozy, vintage-inspired touch to your creative space, making them perfect for bullet journaling, card-making, or even decorating digital planners!

What’s Inside?

  • 58 unique hand-drawn stickers featuring four home styles: a farmhouse, a city house, a farm, and an apartment
  • All four seasons + major holidays and observances beautifully illustrated
  • High-quality 300dpi files in PNG, JPG, and PDF formats for crisp prints
  • Instant download – receive a PDF with links to your Google Drive files

Why You’ll Love These Stickers

  1. Timeless Pencil Art – The hand-drawn style gives each sticker a soft, nostalgic feel, perfect for cottagecore lovers and stationery enthusiasts alike.
  2. Seasonal Versatility – Use these stickers all year long! Decorate your planner in the spring with a floral farmhouse or mark the holidays with a festively adorned apartment.
  3. Print & Cut at Home – Since they come in multiple formats, you can print them as sticker sheets, use them digitally, or cut them out for scrapbooking fun.

Get Your Cozy Cottage Stickers Today!

The Cozy Cottage Sticker Pack is now available in my Etsy shop! Once purchased, you’ll receive a PDF file with links to download all your stickers from Google Drive—easy, convenient, and ready for your next creative project.

👉 Shop now: https://abbeyandlincoln.etsy.com

I’d love to see how you use these stickers! Tag me on social media with #CozyCottageStickers to share your creations. Happy journaling!

Binge Like A Pro

Binge like a pro. One of the perks of knitting and crocheting as a career is getting to stream shows while you work. I can knit (and purl) with my eyes closed and I’m just getting to the point where I don’t have to constantly look at the work while I crochet. That means I can concentrate that much more on the screen while still doing quality work.

But binge watching while knitting or crocheting is a learned skill. Things can go wrong fairly quickly. If you’re a hobbyist or you’re constantly making things for yourself, you may not have to perfect your craft skill. But for those of that sell our work, it’s critical we don’t smear chocolate on the fiber or goop up our needles and hooks with jelly or fruit juice. There is a method to the madness of streaming while stitching and I am here to give you instruction.

Pick the right project. Binge watching isn’t the time to learn an intricate pattern or to test out new stitches that are unfamiliar. Instead, opt for:

      • Simple stitch patterns: Stockinette, garter stitch, or repetitive granny squares.
      • Small projects: Hats, scarves, or dishcloths are perfect for shorter binges.
      • Pre-marked patterns: Use stitch markers and row counters to keep track effortlessly.

Pick the right show. You don’t want to deal with a cliffhanger or a mystery that will call for your full attention. You want to enjoy what you’re watching but you also want to make progress. 

  • For high-focus projects: Rewatch a beloved series or pick a lighthearted sitcom.
  • For mindless stitching: Dive into gripping dramas, documentaries, or thrillers.
    Bonus tip: Subtitled shows can be tricky unless you’re a crafting multitasker extraordinaire!

Create a Comfortable Setup

Setting the stage is crucial for a stress-free knit-and-chill session:

  • Lighting: A good task lamp will keep your stitches visible without ruining the cozy ambiance.
  • Seating: Choose a chair or couch with good back support. Add a lap cushion to prop up your project.
  • Storage: Keep your yarn, scissors, and stitch markers within arm’s reach.

Snack Smart

Snack cravings strike mid-binge, but greasy fingers and delicate yarn don’t mix. Opt for:

  • Finger-friendly snacks like popcorn, grapes, or pretzels.
  • A spill-proof cup or water bottle to stay hydrated.

Set Goals (But Stay Flexible)

It’s easy to lose track of time during a good binge-watch. To stay productive, set small goals:

  • “I’ll finish this section by the end of the episode.”
  • “This season = one finished hat.”
    But don’t stress! The point is to enjoy the process.

Prep for Marathon Sessions

Planning a day of crafting and streaming? Prepare like a pro:

  • Stretch regularly: Take breaks to avoid stiff hands and a sore neck.
  • Keep essentials handy: Think extra yarn, a blanket, and maybe even your pet for added coziness.
  • Line up your next binge: Nothing kills the vibe like endlessly scrolling for something to watch.

Join the Knitflix Community

Crafting doesn’t have to be a solo activity! Share your progress with online communities:

  • Post photos of your “Knitflix” setup on Instagram or Pinterest.
  • Join Facebook groups or forums for craft and TV enthusiasts.

Track Your Progress

Use a notebook or app to track your project progress and TV achievements. Bonus points if you create themed projects inspired by your favorite series!

Final Thoughts

Crafting while binge-watching is more than a hobby—it’s a lifestyle. Whether you’re knitting a scarf while exploring Middle Earth or crocheting a blanket as detectives solve mysteries, the key is to find the balance between stitches and screen time.

What’s your favorite show to craft to? Share your recommendations and projects in the comments below! Happy Knitflixing! 🎥🧶

  1.  

Ten Time Saving Tips for Busy Knitters and Crocheters


Ten Time Saving Tips for Busy Knitters and Crocheters is coming – but first: Straight Outta the Farmer’s Market is my latest POD from Abbey & Lincoln. It’s fleece so it’s good for fall, winter and spring. Check it out at the link. Now on to those tips.

It’s kinda unfair of me to count myself as a busy knitter or crocheter. I mean, I am a busy knitter and crocheter but I’m busy knitting and crocheting because it’s the gig. For most folks, knitting and crocheting helps them relax from the busy. For all of us, that time is precious and we want to make the most of it. Here are some tips that will help you do just that.

Organize Your Supplies

A cluttered yarn stash can slow you down. Take time to organize your yarn, needles, hooks, and patterns. Use bins, baskets, or shelves to store your supplies, and label them clearly. Having everything within easy reach means you’ll spend less time searching and more time crafting.

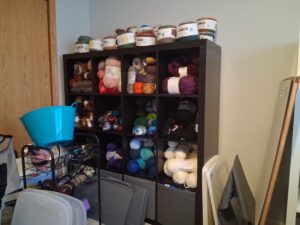
This I know from experience and this is number one because I have to apply this tip to my life. At this moment, I don’t know what’s in my yarn stash and I don’t know where a set of my interchangeable knitting tips are. This wastes time and also money. The yarn stash will be it’s own job to tackle but I can certainly round up the needles, hooks, etc. and put them in an accessible place where I can grab and go.

Plan Your Projects in Advance

Create a project list with a clear priority. Use tools like Ravelry or a bullet journal to organize patterns and track progress. Planning ahead ensures you’re always ready to pick up your next project without hesitation. I started this on an Excel spreadsheet. It is sorted to desighbcb on Etsy, Abbey & Lincoln and designbcb boho.

Use Chunky Yarns and Bigger Hooks or Needles

When you’re pressed for time, projects made with chunky yarns and larger hooks or needles can work up quickly. These are perfect for cozy scarves, blankets, and hats that deliver instant gratification.

Work on Portable Projects

Choose small, portable projects that you can take anywhere. Socks,(though I don’t make them and it would take a lot to get me to do it) dishcloths, and baby items are easy to carry and can be worked on during lunch breaks, commutes (if you’re not driving!), or while waiting for appointments.

Learn to Read Your Work

Take a look at your work after each row of the pattern so you can see how it flows and what the stitches look like. This will help if you have to put down your work and don’t have time to mark it.

Batch Similar Tasks

Save time by batching tasks like winding yarn, sewing seams, or weaving in ends. Set aside specific times to handle these less exciting parts of crafting so you can focus on the fun parts—knitting and crocheting.

Use Stitch Markers, Row Counters and Life Lines

Tools like stitch markers and row counters can help you keep track of your progress, especially with complex patterns. A life line is useful if you’re doing a lace stitch or a long pattern where have to start over from the beginning will make you want to pull someone’s hair out. These tools prevent mistakes that could cost you time and energy to fix later.

Join a Crafting Group

Knitting or crocheting with others can keep you motivated and accountable. Crafting groups often inspire you to finish projects faster while providing tips and encouragement. If you can’t attend in person, join an online group or forum.

Learn to Love Simple Patterns

Complicated patterns are rewarding but can be time-consuming. When you’re short on time, opt for simple patterns with repetitive stitches. These are quicker to work on and often just as beautiful.

Set a Timer and Craft in Short Bursts

If you’re busy, even 15-30 minutes a day can make a difference. Set a timer and focus solely on your project during that time. You’ll be amazed at how much you can accomplish in just a few focused sessions each week.

Bonus Tip: Embrace Progress, Not Perfection

Remember, crafting should be enjoyable, not stressful. Celebrate the progress you make, no matter how small, and don’t worry about achieving perfection. Every stitch is a step closer to your finished project.

With these time-saving tips, you can make the most of your crafting moments and keep your passion for knitting and crochet alive—even on the busiest days. Which tip will you try first? Let me know in the comments below!


I Live and Breathe

I live and breathe yarn. So much so that I have a storage bin that holds nothing but yarn and yarn related things. And the storage bin holds most of it and it’s almost full. I can honestly say I have too much. One of my goals for 2025 is to downsize the stash so that it all fits in the closet. With the doors closed. That will be a very tall order but I am motivated because I don’t want to pay to have my yarn held offsite.

Motivated and excited because I like having my days centered around being creative and making pretty things with sticks and strings. I know this is a blessing and some people can’t do it. That is another reason to become responsible for the gift and the blessing and not be wasteful of it. Believing this is a day made by the spirit; this is what my day is like:

The day begins with a protein shake and a quiet moment in my yarn room—my sanctuary. With over 1,000 skeins of yarn in my collection, the possibilities feel endless. I start by reviewing seeing if I have any new sales. This is more like from October – February. The rest of the year, sales are a surprise. Though I hope to change that by being more season conscious and adding more patterns.

I have a schedule of projects. I work on them in groups of three. One for designbcb, Abbey & Lincoln and GoImagine. They can also double as inventory for craft shows. My schedule is divided on an Excel worksheet with each cell being an hour. Most of the cells are filled with knit/crochet but there are other things in there as well: church, study, cleaning, paying bills…other things I need to accomplish during the day. Workouts are there, too, twenty times. Workout times vary so I can get in 2-5 hours of exercise a week.

Getting to Work

I start whatever is on my spreadsheet to do. One of the perks of knitting and crocheting for a living is being able to stream something or listen to music. I have a full menu of streaming channels and I alternate through them. Some of the shows I enjoy while streaming are Call the Midwife, 9-1-1 Austin, all the FBI series and some movies.

The reason I enjoy it is because I enjoy the process. I get something pretty in the end but it is the act that is the thing that reaches my soul. The reason I opened an Etsy shop was because I had so much stuff lying around the house and the biannual sales we had at church didn’t clear out enough of it. I opened a shop as a consequence of all the knitting and crochet.

Taking Care of Business

Once a project is finished, I change the color of it on the spreadsheet and then the business part of the day kicks in. It has to photographed, priced, listed in one of the stores. If it is a physical item, it has to be logged onto my Square app so I have it for a craft show. I will write a blog post about and a yarn review if it is made with yarn. It needs to be posted to all my social media, logged into a inventory book, added to the newsletter, (sign up for it here.) Finally, it gets added to the shop carousel.

It’s quite the process and can take a minute before it’s all done. It doesn’t help that I am easily distracted and things don’t always go as planned. The day is pretty long and ambitious. There are free hours designated, as well. They come in handy. My day goes pretty late, I usually in bed by 1 or 2am.

What does your perfect knit and crochet day look like? Share your routine or favorite moments in the comments below—I’d love to hear how you bring yarn to life!

A Case of the Scrunchies

It’s a case of the scrunchies!

Introducing Crochet Scrunchies: Your New Favorite Hair Accessory!

I’m so excited to introduce the latest addition to my Design BCB collection: crochet scrunchies! These beauties are a must-have for anyone who loves unique, handmade items with a touch of charm.

What Makes Crochet Scrunchies Special?

Unlike your typical hair ties, crochet scrunchies add a pop of texture and personality to your hairstyle. Each scrunchie is lovingly handcrafted with soft, durable yarn that feels gentle on your hair. Whether you’re pulling your hair into a high ponytail, a messy bun, or just wearing it on your wrist as a fun accessory, these scrunchies are versatile and chic.

One of the standout designs is our Cranberry Ruffle Scrunchie (pictured above). Its deep red color and playful ruffles make it perfect for the holiday season or as a statement piece year-round. It’s the perfect blend of practical and pretty!

Why You’ll Love Them:

  • Handmade with Care: Each scrunchie is crocheted by hand, ensuring quality and attention to detail.
  • Gentle on Hair: The soft yarn helps prevent breakage and won’t tug or snag.
  • Unique Designs: No two scrunchies are exactly alike, giving you a one-of-a-kind accessory.
  • Eco-Friendly: By choosing handmade items, you’re supporting sustainable and eco-conscious fashion.

Styling Tips:

  1. Effortless Chic: Pair a crochet scrunchie with a loose braid for a boho-inspired look.
  2. Holiday Glam: Use a bold color like Cranberry to add a festive touch to your updo.
  3. Everyday Comfort: Wear it on your wrist as a bracelet when you’re not styling your hair—practical and stylish!

Perfect for Gifting

Crochet scrunchies make thoughtful and affordable gifts for friends, family, or coworkers. With their handmade charm, they’re a delightful way to show someone you care. You can even pair them with other DesignBCB items like scarves or tote bags for a coordinated gift set.

Where to Find Them

You can shop these gorgeous crochet scrunchies and more at my online store:

Stay tuned for more colors and designs coming soon! Whether you’re treating yourself or someone special, these crochet scrunchies are sure to bring joy and style to your everyday life.

Let’s Chat!

I’d love to hear your thoughts! Which colors or styles would you like to see next? Have ideas for how to style these scrunchies? Drop your suggestions in the comments or message me directly. Happy crocheting and accessorizing!

Fresh From the Farm

Fresh from the farm? Yes, I know winter hasn’t officially started and I’m already talking about farm fresh veggies! But I just finished designing a shirt that is so cute, I couldn’t wait til spring to tell you about it.

Fresh From the Farm Sweatshirt: A Cozy Cottagecore Essential

If you’re a nature lover, farmer’s market enthusiast, gardener, or simply someone who embraces the charm of cottagecore aesthetics, our latest addition is for you! Introducing the Fresh From the Farm Sweatshirt – a delightful celebration of the earth’s wholesome bounty.

This sweatshirt captures the essence of rustic charm with its playful graphic featuring cheerful, smiling vegetables that are sure to bring a smile to your face. With a combination of cotton and polyester blend, this piece is designed to provide both softness and durability, making it the perfect cozy companion for crisp mornings at the farmer’s market or afternoons spent tending to your garden.

Why You’ll Love It:

  1. Charming Graphics: The vibrant, happy vegetables on the front of the sweatshirt are more than just cute – they’re a reminder of the joys of fresh, farm-grown produce and the beauty of nature.
  2. Unmatched Comfort: The cotton-polyester blend ensures a soft, warm fit while being durable enough to keep up with your active, nature-filled days.
  3. Inclusive Sizing: Available in 7 sizes, ranging from XS to 4XL, there’s a perfect fit for everyone in your life.
  4. Color Variety: With 10 colors to choose from, including earthy tones and bright hues, you can pick the one that resonates with your personal style.

The Perfect Gift:

The Fresh From the Farm Sweatshirt isn’t just for you – it’s a thoughtful gift for loved ones who cherish simple joys and farm-to-table living. Imagine gifting this to:

  • A friend who frequents the local farmer’s market every weekend.
  • A family member who grows their own vegetables and adores gardening.
  • Anyone who loves cozy, unique pieces that celebrate the beauty of nature.

Whether it’s for a birthday, holiday, or just because, this sweatshirt is a gift that’s sure to warm hearts.

Where to Wear It:

  • Farmer’s Markets: Pair it with your favorite jeans and a tote bag to complete your market day look.
  • Gardening Days: Stay comfortable and inspired while tending to your plants.
  • Casual Outings: Add a touch of charm to your everyday wardrobe.
  • Cozy Nights In: Snuggle up by the fire with your favorite book and a cup of tea.

Celebrate the Cottagecore Lifestyle:

Embrace the beauty of slow living and the joys of fresh produce with a sweatshirt that speaks to your love of the earth. The Fresh From the Farm Sweatshirt is more than just apparel – it’s a statement of your connection to nature and appreciation for all things wholesome.

Stock up now to ensure you have your pick of sizes and colors. Whether you’re treating yourself or someone special, the Fresh From the Farm Sweatshirt is a must-have for this season.

Shop now and bring a little bit of the farm into your everyday life!


Knitting and Crochet

Knitting and crochet. None of this knitting vs. crochet. I am going to admit, I used to be team knit even after I took up crochet and learned how to do a proper granny square. You would find me firmly in the knit corner. I had to defend the craft because in my knitting group, most everyone crochet and very few of us knew how to do both. I had to be a defender of the faithful.

But, I must also admit there are things about crochet that make it better than I thought it was. I can now live comfortably with both and recently, I have been doing so much crochet that I was elated when I finally had a knit hat to make. It was a pleasure having needles in my hands again.

Knitting will always be with me. For the most part, the end result is much more impressive in knit than crochet. But for those who may be interested in one or the other, there are some differences worth noting:

Knitting uses two to five needles to create fabric by forming a series of interlocking loops. It creates timeless and timely pieces that are instantly classic and trendy.

Pros:

  1. Smooth, stretchy fabric: Knitting creates a finer, more elastic fabric that’s perfect for garments like sweaters, socks, and hats.
  2. Pattern variety: With techniques like cables, lace, and colorwork, knitting allows for intricate designs that are visually stunning.
  3. Efficient use of yarn: Knitting tends to use less yarn than crochet for comparable projects, making it great for larger items like blankets.

Cons:

  1. Complexity of fixing mistakes: Dropping a stitch can lead to frustration, as fixing errors can require skill and patience.
  2. Time-intensive: Knitting, especially for larger projects, can be slower than crochet.
  3. Less sturdy: The delicate loops in knitting can stretch out more over time compared to crochet.

Crochet is done with a single hook, creating a fabric by pulling loops through one another. Its unique construction makes it ideal for certain textures and projects.

Pros:

  1. Faster progress: Crochet often works up faster, making it a great choice for quick projects like scarves, baby blankets, or home decor.
  2. Easier to fix mistakes: Frogging (unraveling stitches) is simpler, and you’re less likely to drop loops.
  3. Sturdy fabric: Crochet creates a thicker, more robust fabric, ideal for bags, rugs, and amigurumi (crocheted toys).

Cons:

  1. Yarn usage: Crochet generally requires more yarn than knitting for similar-sized projects.
  2. Less elasticity: While crochet is sturdy, it can lack the stretch and drape that knitting offers.
  3. Fewer patterns for garments: While crochet garment patterns exist, they’re less common and often bulkier than knitted pieces.

Knowing how to do both has increased my love of this creative skill and knowing I can change to either one with whatever I am making, is gratifying in so many ways. I don’t know how to determine which one is better for anyone else to learn and I cannot imagine not doing both. I can crochet everything I knit but I cannot knit everything I crochet, at least it would take more work for me to translate. Luckily, I don’t have to. I get to enjoy both!

Do you have a preference? Want to learn one or the other? Leave comments and share!

10 Crochet Essentials


10 crochet essentials. If you want to learn how to crochet or improve that skill, these are things you will need to know.

But first, before we get into the nuts and bolts of those essentials, I want to take a moment to show the latest addition to Abbey & Lincoln, the Flowers and Bees sweatshirt. It’s a cozy short, 100% cotton and perfect for gardeners, nature lovers and flower enthusiasts. It’s available in the shop right now in a multiple of sizes and colors.

Now, let’s talk crochet.

I admit: I still like knitting better. I find I am doing more and more crochet projects because crochet is faster and the movement is more artistic, but I like the looks of the end result better when it’s knit. But crochet is still growing on me. Most of the people in my knit group crochet and as I continue to do more of it and hear people say they want to learn how to do it, the more this list became necessary. So, if you want to jump on the knitting bandwagon, here are some ‘good to knows.’

Slip Knot and Foundation Chain

You are either going to start your project with a slip knot or a magic loop (more on that later.)

The slip knot is where it all begins. It’s the starting loop on your hook and the foundation of every crochet project. The foundation chain is the first row of chain stitches that anchors your work. Mastering a uniform chain tension will set you up for success in your project.

Tips:

  • Practice making your chain loose and even, as it will help the rest of your stitches stay consistent.

Let me say for the record that I hate calling a stitch a chain. The entire thing is a chain, the individual things are stitches. So when the instructions say ‘chain 6’. I’m ok with that. When they say place your hook in the second chain, there is no second chain; there’s a second stitch. Putting away my soap box now.

Single Crochet (SC)

The single crochet is one of the simplest stitches but also one of the most versatile. It creates a dense, textured fabric and is commonly used in amigurumi, scarves, and blankets. Single crochet is often the first stitch beginners learn and is a foundation for more advanced stitches.

Tips:

  • Keep your tension relaxed to avoid making stitches too tight.
  • Single crochet is great for creating solid pieces without holes.

. Half Double Crochet (HDC)

The half double crochet stitch (my personal favorite) strikes a balance between the height of a single and double crochet. It creates a thicker fabric with a bit more drape than single crochet, making it ideal for sweaters, hats, and cozy scarves.

Tips:

  • The extra yarn-over in half double crochet adds height to your stitch, so use it when you want a less dense fabric but still good coverage.

Double Crochet (DC)

Double crochet is a taller stitch that creates a looser, more open fabric. This stitch is perfect for airy garments, lightweight blankets, and projects where you want to work up rows quickly.

Tips:

  • Double crochet is ideal for lacy patterns and blankets that need more drape.

Treble Crochet (TR)

The treble (or triple) crochet stitch is the tallest basic stitch. It produces an open fabric and adds height, making it perfect for lacy designs, shawls, and scarves.

Tips:

  • This stitch is great for creating open, airy patterns. But be careful with tension, as it can get too loose.

Magic Ring (Magic Circle)

The magic ring is a technique used for starting projects in the round, like hats, amigurumi, and doilies. Unlike a foundation chain, the magic ring allows you to pull the loop tight, leaving no gap in the center of your work.

Tips:

  • Practice pulling the ring tight to avoid gaps in the center of your circle.
  • Use this technique to create a more polished look for round projects.

Increasing and Decreasing

Increasing adds stitches to your row or round, while decreasing removes stitches. Mastering these techniques opens the door to shaping garments, hats, and intricate designs.

Tips:

  • To increase, simply add two stitches in one stitch space.
  • For decreasing, crochet two stitches together to reduce stitch count gradually.

Front and Back Post Stitches

Front and back post stitches add texture and dimension to your work by working around the post (vertical part) of a stitch rather than into the top loops. These techniques are commonly used for creating ribbing, cables, and basketweave textures.

Tips:

  • Experiment with these stitches to add texture to blankets, sweaters, or home decor items.
  • These stitches can be a bit tricky at first but add a lot of dimension to your projects.

Color Changing

Adding color changes adds life and creativity to your projects. Mastering this technique allows you to create patterns, stripes, and even pictures within your work.

Tips:

  • Make color changes at the last yarn-over of the previous stitch for seamless transitions.
  • Weave in loose ends as you go to keep the back of your work tidy.

Blocking

Blocking is the finishing technique that makes your work look professional and polished. It involves wetting or steaming your piece and shaping it to the correct size and shape. Blocking helps stitches relax, and it’s essential for projects like lace shawls and garments.

Tips:

  • Use rust-proof pins and a blocking mat for best results.
  • For delicate yarns, steam blocking is often gentler than wet blocking.

 If I were to add one more, it would be gauge. I don’t often pay attention to gauge because it really isn’t essential with what I make. I can even make hats and disregard gauge. But if you’re make more fitted garments, this becomes important to the sizing is correct.

There you have it, the things you need to know to have hours of relaxing and productive fun with crochet!


So, You Want to Learn to Knit

So you want to learn to knit.  OK, this post isn’t going to teach you how but you can consider it a preliminary class on what you will need to get to that knitting place. 

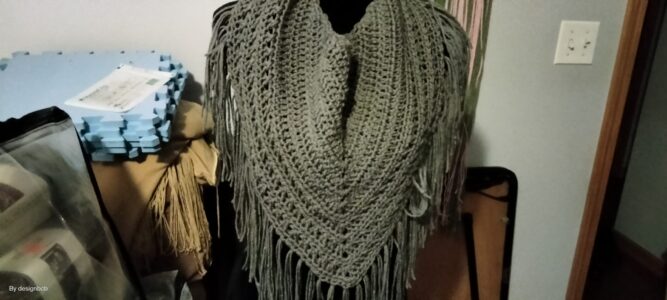
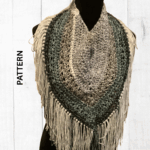
But first, you will notice the photo is crochet. And you would be right. They’re the latest hooded scarves. Just wanted you to know there were others out there and already in the shop. Now, on to the knitting.

I take a knit or crochet project to work on when I do a craft show. One, there is always a lull and I might as well be productive and two, it shows I do the actual work. This always causes at least one person (more than one) to comment how they always wanted to learn how to knit or crochet because their mother, grandmother, great aunt, a friend of a friend’s second cousin once removed on her father’s side, knew how and they made gorgeous stuff and they should really pick it up again.

If this is you, and you want to get into knitting, I will go over some of the things you need to know. Knitting is fun, relaxing and productive. It is also a sport. As much as I would like to think absolutely everyone can learn to knit, not absolutely everyone can. But for those fortunate few (million) this is one of the greatest skills in the world.

First, the materials

There are things you will need in order to start any project:

Yarn (or some kind of fiber, let’s start with yarn) Acrylic is the most affordable or you can go to any of the natural fibers. Purely preference

Knitting needles – you can knit with two to five needles. Let’s start with two. The yarn label will give the recommended needle size. I suggest starting with bamboo needles as they don’t slip as much as metal ones.

Scissors – you will have to cut something

Tape measure

Yarn needle – you will need this to weave in the ends.

Stitch marker (optional but fun)
Row counter – which can be as simple as a pen and paper 

Knitting – Let’s start at the beginning

There are only two stitches in knitting: the knit stitch and the purl stitch. There are two other pseudo stitches: the yarn over and the slip stitch. Every pattern will use at least one of these. In order to start, you will have to cast on. Once you’re done with all the knitting and purling, you will then cast off.

 Casting on is the action that gets your first yarn onto your needles so you can work them. The two most common cast ons are the long tail cast on. There are other styles and you can learn them as you need them. But when you first learn, you will likely be taught one of those. There are dozens of YouTube videos that can show both methods. 

The Knit Stitch – Right handed knitters

This stitch is the foundation of knitting. To make a knit stitch, hold the needle with the cast-on stitches in your left hand and the empty needle in your right. Insert the right needle into the first stitch from left to right so the needle ends up behind the left needle, wrap the yarn around the right needle, and pull it through to create a new stitch on the right needle. Slide the old stitch off the left needle. Repeat this process until you’ve knitted all the stitches on the left needle.

The Purl Stitch:

This stitch is the complement to the knit stitch. With the needle in your left hand, insert the right needle into the first stitch from right to left so the right needle ends up in front of the left, wrap the yarn around the right needle, and pull it through to create a new stitch. Slide the old stitch off the left needle and repeat for each stitch on the row.

Binding Off:

Also called “casting off,” this technique finishes your knitting project and keeps the stitches from unraveling. To bind off, knit the first two stitches, then use the left needle to lift the first stitch over the second stitch and off the needle. Continue this process until one stitch remains. Cut the yarn, leaving a tail, and pull it through the last stitch.

Once you’re comfortable with the knit and purl stitches, you can start making simple patterns. Here are a few beginner-friendly patterns to try:

  • Garter Stitch: Knit every row. This creates a stretchy, bumpy texture that’s perfect for scarves and blankets.
  • Stockinette Stitch: Alternate between a row of knit stitches and a row of purl stitches. This creates a smooth, “V” pattern on one side and a bumpy texture on the other, often seen in sweaters and other garments.
  • Ribbing: This pattern is created by alternating knit and purl stitches in the same row. For example, a “2×2 rib” means knitting two stitches, then purling two stitches across the row. Ribbing is commonly used for cuffs and edges because it’s stretchy.

As with any new skill, learning to knit requires patience and practice. Here are some tips to help you along the way:

  • Start Small: Begin with small projects like a dishcloth or scarf. These projects are quick to finish and help you build confidence in your skills.
  • Watch Tutorials: Videos are incredibly helpful for beginners to see how to hold the needles, yarn, and how to execute each stitch. There are plenty of free tutorials available online.
  • Don’t Worry About Perfection: Mistakes are a part of the learning process. If you drop a stitch or knit one stitch incorrectly, don’t be discouraged. With practice, these mistakes will happen less frequently, and you’ll learn how to fix them.
  • Count Your Stitches: It’s easy to accidentally add or drop stitches, which can alter the shape of your project. After each row, quickly count your stitches to ensure you have the correct number.
  • Practice Tension: Consistent tension helps your stitches look even. New knitters often knit too tightly or too loosely. Try to keep your stitches loose enough to slide easily on the needle but tight enough to maintain a neat appearance.
  • Gauge: Somewhere along the line, you will learn about gauge. It is making sure the measurements of your piece are accurate. Not so important on somethings but very important on others.

When you finish knitting, it’s time to complete your project with a few finishing touches:

  • Bind Off: Use the binding off technique mentioned above to secure your stitches and give your project a clean edge.
  • Weave in the Ends: Use a tapestry needle to weave the loose ends of yarn into your project. This step not only makes your project look neat but also secures the ends so your knitting doesn’t unravel.
  • Blocking: This optional step can improve the appearance of your project, especially if you’ve made a lace or intricate pattern. To block, soak your project in water, gently squeeze out the excess, and pin it flat to dry. Blocking evens out stitches and can help your project hold its shape.

Explore Patterns and Projects

After mastering the basics, you’ll be ready to tackle more complex patterns. Here are a few project ideas to inspire you as you continue learning:

  • Scarves: Scarves are classic beginner projects. You can practice different stitch patterns and learn how changing yarn types affects the look and feel.
  • Hats: Hats introduce circular knitting and decreases, giving you a chance to expand your skills.
  • Blankets: A basic blanket with simple stitches is a great long-term project and provides plenty of practice.
  • Washcloths or Dishcloths: These small projects are excellent for practicing stitch patterns and make useful, eco-friendly items.

   Join the Knitting Community

One of the joys of knitting is becoming part of a welcoming community of fellow crafters. Many knitters join local knitting groups, online forums, or social media communities where they can share their projects, learn new techniques, and gain inspiration. Consider joining sites like Ravelry, where you can browse patterns, track your projects, and connect with other knitters around the world.